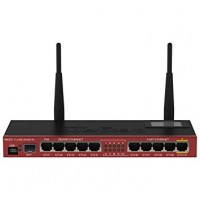
In this guide, we will explain to you how to easily configure your VPN connection on any Mikrotik router. Please follow the steps below.
I) Connecting to Your Router
Before setting up a VPN connection on your Mikrotik router, it is important that you connect to your router first. You can do that by going to http://192.168.1.1 from your browser. If you are still having troubles accessing this page, in this case, you will need to refer back to your Mikrotik router’s manual to obtain the default gateway address.
II) Configuring VPN on Your Router
1- From the left side panel, click on “PPP”, and then click on the “+” sign on the top left side of the window.
2- By clicking on “+” sign, a menu with a list of VPN encryption protocols will expand. You can choose the VPN protocol you wish to connect to, for example: “SSTP Client”, “PPTP Client” or “L2TP Client”.
3- A small window interface will open in which you will need to fill in with your VPN connection settings. Click on the “General” tab, and then add a name for your VPN connection.
4- Next, go to the “Dial Out” tab, and then fill in the missing fields:
*Connect To: insert the IP address of the VPN server you want to connect to. If you are using bVPN, you can check out their list of servers here.
*User: insert your VPN username.
*Password: insert your VPN password.
Note: if you have selected “L2TP Client” as the VPN protocol you want to connect to (refer back to step 2), then you will need to check the box next to “IPsec”.
5- Click on the “Enable” button located on the right side panel of the interface window.
6- Go to the “Status” tab.
7- In order to make sure that your VPN connection is “Up”, check on both “Last Link Up Time” and “Uptime”.
8- Click on “OK” to save the changes you have made and close the current window.
9- If you look at the PPP window, you should see the VPN connection you have just created. This means that your connection is ready with the letter “R” next to it.
9- Go back to the main window and select “IP” from the left right panel.
10- Click on “NAT” tab, and then click on the “+” sign.
11- A new window will open, click on “General” tab.
12- In the “Chain” field, click on the arrow to expand the drop down menu and select “srcnat”.
13- In the “Out.Interface” field, select the name of the VPN connection you have just created.
14- Go to the “Action” tab, and then from the “Action” field, select “masquerade”.
15- Click on “Apply” to save your settings, and then click on “OK” to close this window.
16- You will be redirected to the “Firewall” menu. Click on the “Mangle” tab, followed by a click on the “+” sign.
17- Once the “Mangle” window opens, click on “General” tab.
18- In the “Chain” field, select “prerouting”.
19- In the “Src. Address” field, enter the VPN IP address you want to connect to.
20- Now, go to “Action” tab and select “mark routing” in the “Action” field.
21- In the “New Routing Mark” field, enter a new routing mark (the VPN connection you created). After that, mark the checkbox next to “Passthrough”.
22- Click on “Apply” to save the changes you made, and then click on “OK” to close this window.
23- Go back to the main window of your router, and click on “IP” again, and then select “Routes” this time followed by a click on the “+” sign.
24- Click on “General” tab, and then enter “0.0.0.0/0” in the “Dest. Address” field.
25- Select the VPN connection you created from the “Gateway” menu.
26- Next, from the “Type” menu, select “unicast”.
27- In the “Routing Mark”, select your VPN connection.
28- Click on “Apply” to save your settings, and then click on “OK” to close this window.
29- Go back to “IP” applet, and then click on “DNS” to set up your DNS server settings.
30- Enter the DNS server address you want to connect to (e.g: Google DNS), and then check the “Allow Remote Requests” checkbox.
31- Click on “Apply” to save your settings, and then click on “OK” to close this window.
Congratulations! You have successfully configured your VPN connection on your Mikrotik router.


